Managing Items
Items are the core of your Stockaj inventory. An item represents anything you track — equipment, furniture, tools, supplies, or any physical asset.
Items List
Navigate to Inventory → Items to view all items in your workspace.
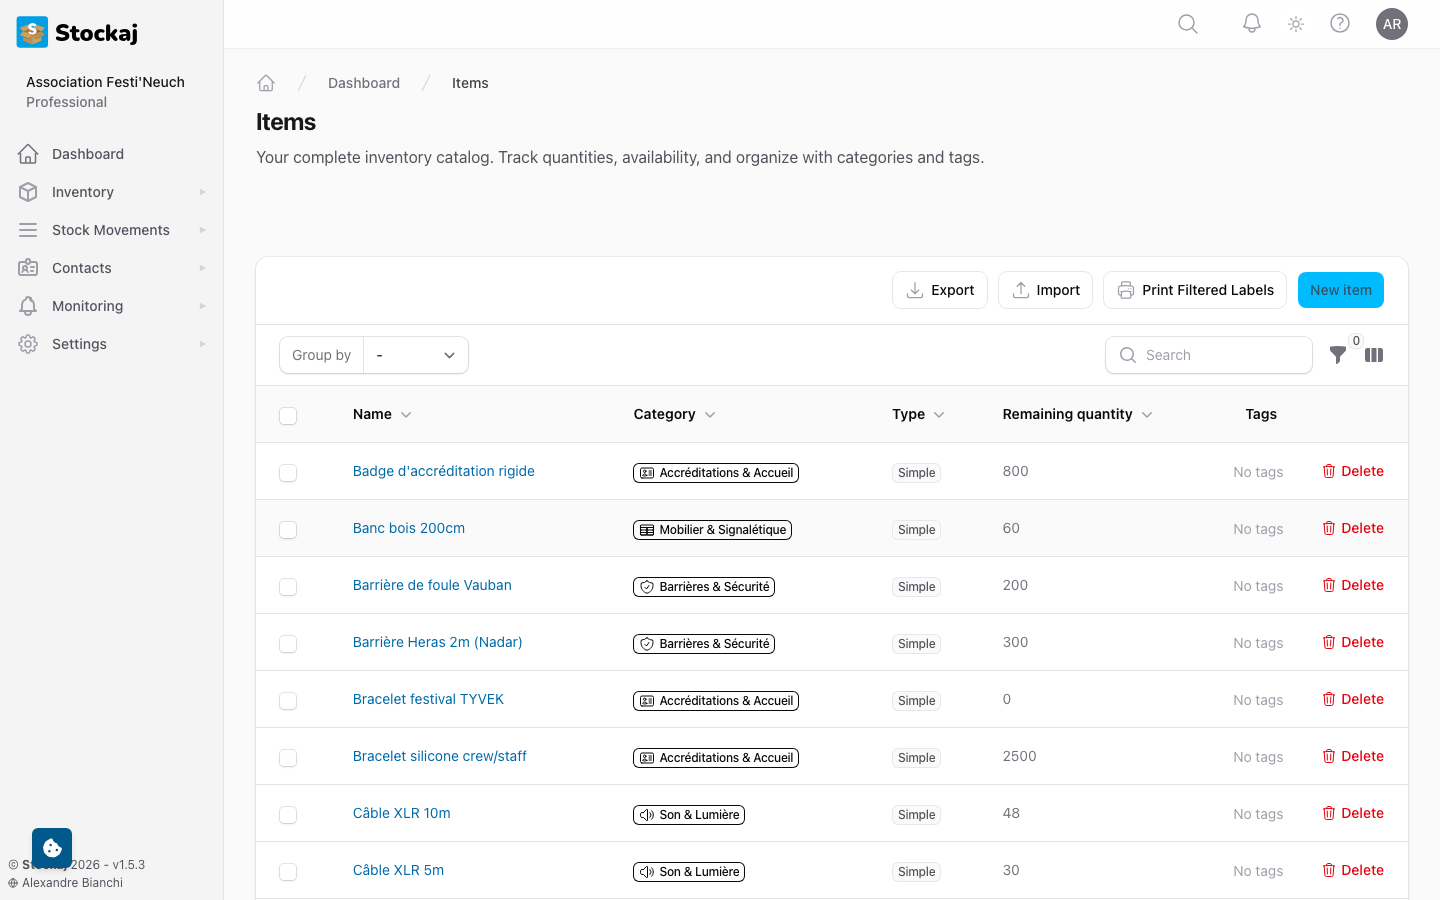
Search & Filter
- Search — Use the search bar to find items by name, code, or external ID. Stockaj uses full-text search for fast results.
- Filters — Filter items by category, tags, stock status, and more using the filter panel.
- Sorting — Click column headers to sort by name, quantity, category, etc.
Bulk Actions
Select multiple items using the checkboxes to perform bulk actions:
- Export — Download selected items as CSV or Excel
- Delete — Move selected items to trash
- Bulk QR — Generate QR codes for selected items
Creating an Item
- Click + New Item from the items list.
- Fill in the required fields:
| Field | Required | Description |
|---|---|---|
| Name | Yes | The item name (max 255 characters) |
| Category | Yes | Select an existing category or create a new one |
| Quantity | Yes | How many units you have (minimum: 0) |
| Code | No | A custom identifier (e.g., barcode, SKU) |
| External ID | No | An ID from an external system (must be unique per workspace) |
| Description | No | Detailed description of the item |
| Minimum Quantity | No | Threshold for low stock alerts |
| Tags | No | Assign one or more tags for organization |
- Click Create to save the item.
Item Dashboard
Click on any item to open its Item Dashboard — a detailed view of the item's complete information.
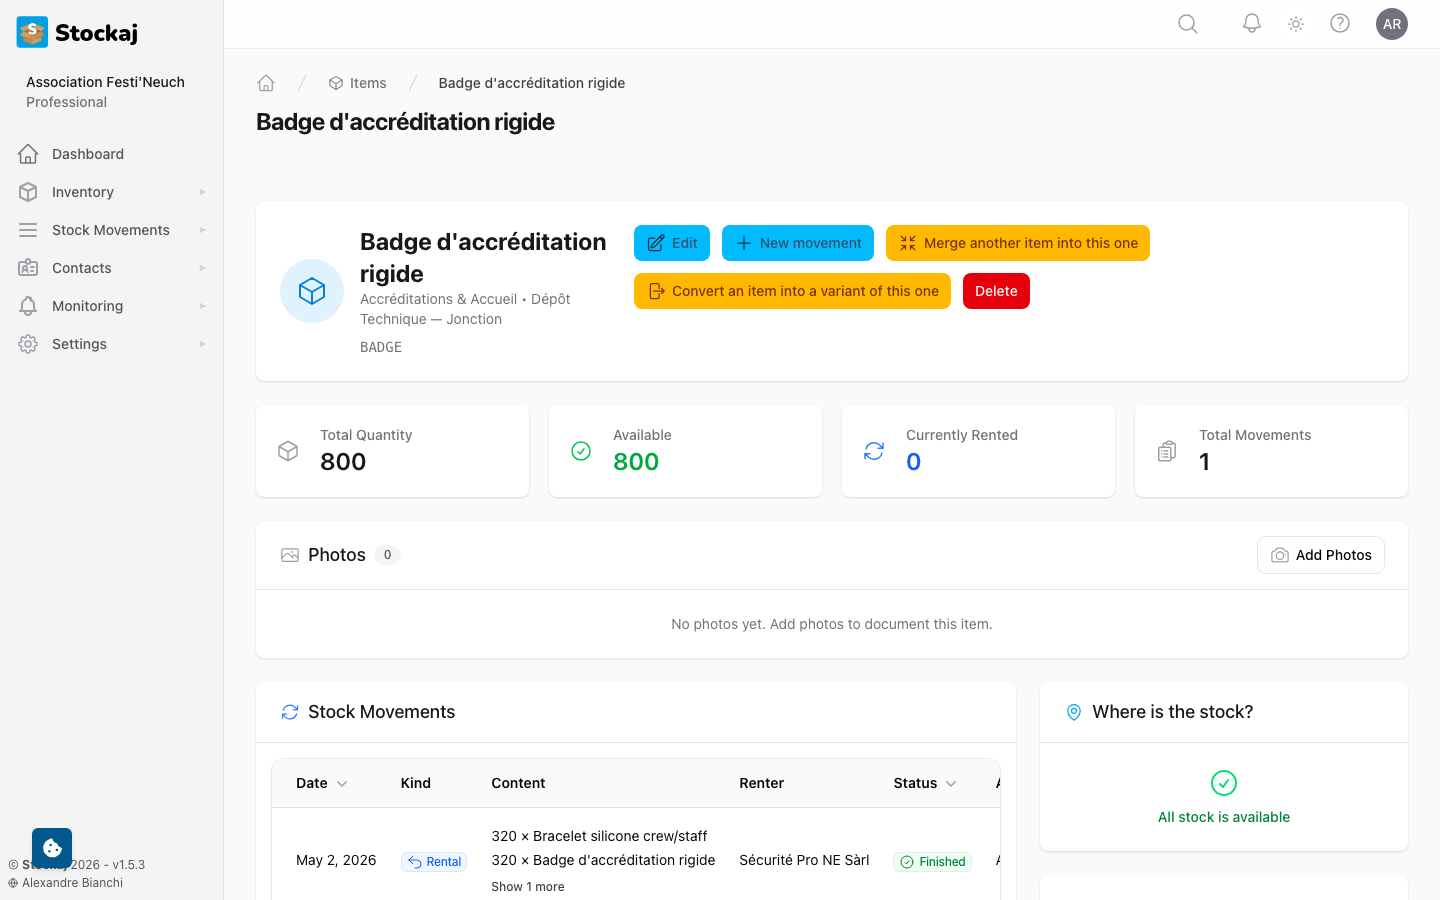
The dashboard shows:
- Item Details — All properties, custom fields, and tags
- Rental History — All past and current rentals involving this item
- Quantity Events — A log of all quantity changes (additions, removals, adjustments)
- QR Code — Scannable QR code for quick access
Editing an Item
From the item dashboard, click the Edit button to modify any field. Changes are saved in real time.
Quantity Management
You can adjust item quantities directly:
- Add Quantity — Increase stock (e.g., receiving new items)
- Remove Quantity — Decrease stock (e.g., items lost or damaged)
Each quantity change is logged with a reason, so you always have an audit trail.
Quantity Event Reasons
| Reason | Description |
|---|---|
| Purchase | New items purchased |
| Return | Items returned from rental |
| Adjustment | Manual stock correction |
| Damaged | Items marked as damaged |
| Lost | Items marked as lost |
| Transfer | Items moved between locations |
Item Photos
Each item can have a cover image (the main photo shown in lists and dashboards) and an optional gallery of additional images.
Cover Image
The cover image is shown wherever the item appears in the UI. To manage it:
- Upload — On the item dashboard, click the photo area or the Upload Image button and select a photo.
- Remove — Click the Remove Image button to delete the current cover image.
Only one cover image is supported per item.
Image Gallery
The gallery lets you store multiple photos of an item — useful for showing different angles, accessories, or condition notes.
- View gallery — Open the item dashboard and scroll to the Gallery section.
- Add photos — Click Upload to add one or more images to the gallery.
- Remove a photo — Click the delete button on any gallery image to remove it.
Gallery images are stored per item and are visible in the item dashboard only (not in list views).
Importing Items
You can bulk-import items from a spreadsheet:
- Go to Inventory → Items and click the Import button.
- Upload your CSV or Excel file.
- The Import Wizard lets you map your file columns to Stockaj fields.
- Review the mapping and click Import.
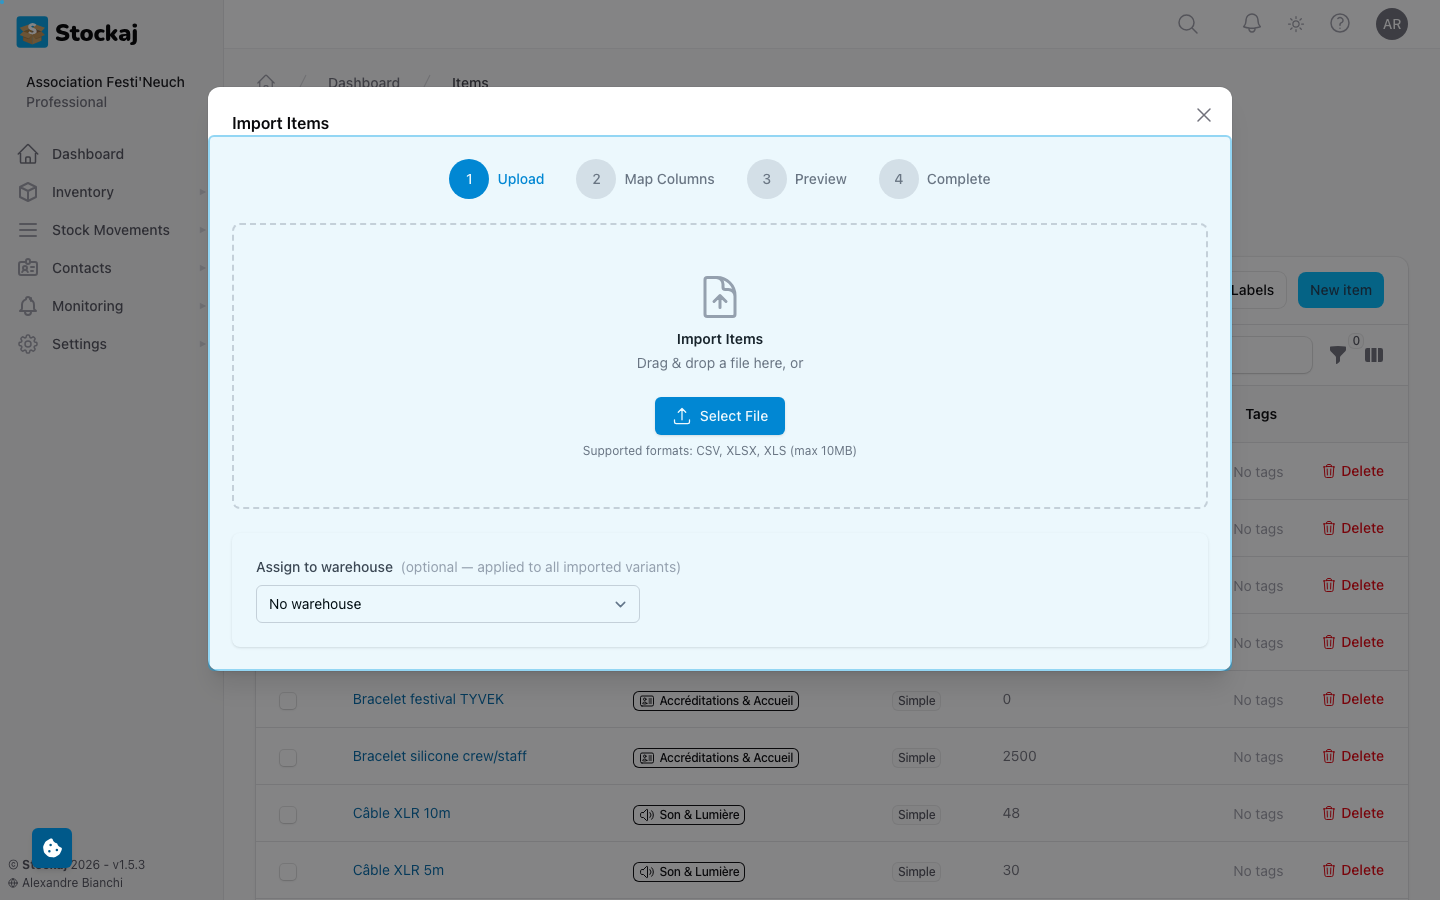
Download the import template first to ensure your file is formatted correctly.
Exporting Items
- From the items list, click Export.
- Choose your format: CSV or Excel.
- The export will be generated and downloaded automatically.
Exports include all visible columns and respect any active filters.
Deleting & Restoring Items
- Delete — Items are soft-deleted (moved to trash). They no longer appear in the main list but can be restored.
- Restore — Access trashed items via the "Trashed" filter and click Restore to bring them back.
Permanently deleting items cannot be undone. Make sure to only delete items you no longer need.